Followers

6 Sept 2013

Doo Lally Pip Cards by Lisa Coles

Morning Crafters
Lisa has very kindly shared her wall hanging and card she made using the fab Doo Lally Pip stamp

You can see Lisa's project in full by popping over to her blog

http://leacraftworld.blogspot.co.uk

Lisa has just started her blog, so please support a new blogger, as i'm sure she will have lots more fab project to share


Thank you so much for sharing with us Lisa xx

Make sure to pop back to the blog today as the next blog challenge will be starting ..............

2 Sept 2013

Steampunk Spells Stamps Set 1.

Hi Blogbuddies  Angela here, hope you are all well.
It's time for the next round of Design Team projects and I am here to kick it off with the Steampunk Spells Stamp Set 1.
These are definitely my sort of stamp and I have had fun working with them.
I have used a few other things and couldn't resist including some of the Graphic 45 papers.
If you go over to my blog you can see some of the samples I made whilst playing around with these stamps.
I decided to use Mega flakes amongst other things which are also available from the Ali-Craft shop.

Here is the front of the finished card.


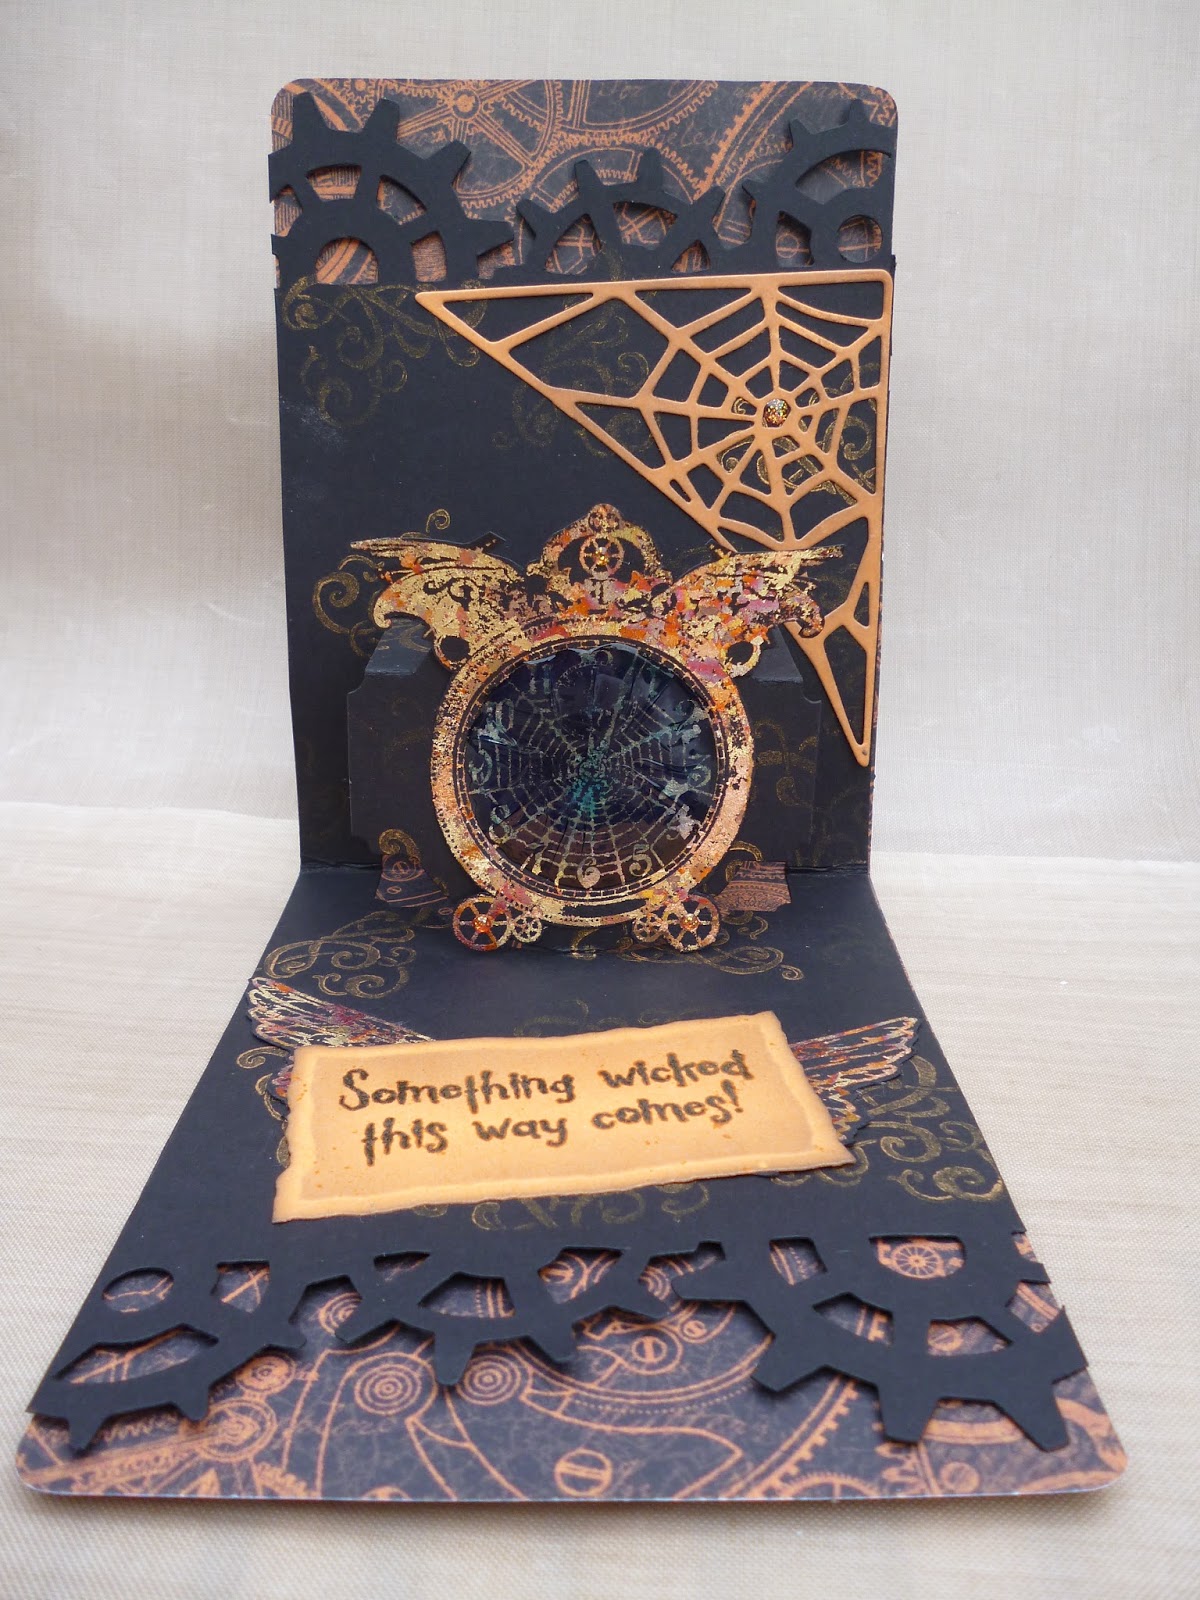
This is the insert of the card which has been made with the Sizzix Pop and Cut die.

 
Stash requirements for making.


Also used:
            Graphic 45 Paper Steampunk Spells.
Indigo Blu Mega Flakes and Flitter Glue.
 Clear embossing powder.
Utee.
  Black Soot distress Ink.
Archival Ink.
Brilliance Ink pad.
Perfect Medium.
3D Clear Glaze.
Deckled edged scissors.
Spellbinders Deckled dies.
Cottage Cutz Spiders Web die.
Sizzix Pop and Cut die.
Tim Holtz Steampunk on the edge die.
Brads and Gems.
 
To Make:
First cut the backings for the card as shown and trim the edges of the black card with the Tim Holtz Edge Die.


Next stamp the flourish from the stamp set 3 onto the insert sheet.


To complete the bottle, stamp two onto orange paper and cut the front section from one bottle.
Attach the cut part to the complete bottle and rub over Perfect Medium, dip into Utee and heat emboss. I repeated the embossing three times to give the bottle shape.


You can also see the Love Potion Tag which is stamped with Flitter Glue and finished with Mega Flakes.
I am always surprised at how clear the words are when using the flakes.
 
Next cut the spiders web using the Cottage Cutz die.
This will be attached to the insert.
You can see on the picture below that I have added glaze to the watch face and attached it to the pop-up.

 
Just had to show you this, even with the Mega Flakes, the stamped image is so clear.


Stamped and gilded the wings and then cut them out ready to go onto the insert.
 
The wings were placed under the Something Wicked tag.

 
The front cover has the bottle attached and the mat and layered topper with the Steampunk Spells text on top to complete it.
Finish with brads before attaching.


Everything was completed with a selection of gems.
 
Hope you enjoyed looking at this as much as I enjoyed making it and that you will be tempted to have a go with these stamps.
 
Best Wishes
Angela x


30 Aug 2013

Daventry weekend Retreat


Well, what a Fantastic weekend

Lots of hard work, but a great time was had, fantastic creations, lots of laughs, and great food

WEEKEND RETREAT NO. 3 at DAVENTRY
OUR NEXT DAVENTRY RETREAT WILL BE IN  JANUARY 2014.

Keep a close eye on the website for further details


What a fantastic group of crafters

Just a sample of the fab Canvas projects

Clare did a fab Steampunk Spells book, lots of great pages inside of book


Working Hard


Samples of some of Clare's work

Cheer's girls xx


More pictures over on our Ali-Craft Facebook page
www.facebook.com/pages/Ali-Craft

29 Aug 2013

Breakfast workshop with Iain at the Great Northern Papercrafts Extravaganza


GREAT NORTHERN PAPERCRAFTS EXTRAVAGANZA
05 October 2013 - 06 October 2013 

BREAKFAST WORKSHOP WITH IAIN - ALI-CRAFT

Grahic45 meets MDF with IAIN from Ali-Craft
Create an altered art project with Ali-Craft using the fantastic Graphic45 papers on an MDF project!  You get to choose your paper designs, Christmas to Steampunk so this project will really be yours! 
Cost of workshop is £15, pay a non-refundable deposit of £2 when booking and the balance of £13 on day of workshop.

This workshop will be held on both the Saturday and repeated on Sunday
You will need to book through Craftwork Cards

Workshop starts promt at 08:45am and finishes 09:45am, you then have early access to the show to start shopping!

http://www.craftworkcards.co.uk/events.html


Make sure to book early as places are limited to 16 each day

26 Aug 2013

Primas gets Girly by Clare

Prima gets Girly by Clare
Prima Doll Stamp 

Hi every one
This is the last in our series of tags showcasing the new Prima Doll stamps now on sale over on the Ali-Craft shop.   They really are great fun to work with especially deciding what they're going to wear.  I got all my old papers out that I hadn't looked at for ages and decided to use some from a Kay & Co collection. All the other bits and pieces came from my stash.  the pink butterflies are off cuts of the papers used on the tag, coloured with the same pink marker that I used on the shoes frills and hair band.  I love how you can see the paper design through the colour.

  Here's a short slide show of my tag came together.

The second tag I made with my stamp is a little different.  I used Graphic 45 papers from the On the Boardwalk collection, stamps from Artistic Outposts Boardwalk collection and a few inks.  I love how it came out and really enjoyed making both of these tags. 

All the stamps used are available for sale over on the Ali-Craft web site .


I'll be back soon with more design team projects :-) C

19 Aug 2013

Prima Mixed Media Doll Project by Barbara


Prima Mixed Media Doll Project by Barbara

Good Morning crafters.


It is my turn (Barbara), to share with you a blog project using the lovely stamps by Prima for theAli-Craft Design Team.

These are a range of Art Doll stamps designed by Julie NuttingThey are suitable for using with a range of Mixed media


Today I am playing with doll number 181


Here is my Memo Board


Here is the Prima Art Doll I used.


First of all, gather your supplies.


As you can see I have used a fair few bits and pieces! 

Martha Stewart Punch
Treasure Gold in Classic
Alphabet Dies
Spiral flower Dies
Felt
Tim Holtz Frosted Film
Chip Board Scalloped Rectangle
Promarkers
Ranger Glue and Seal in Matt
Clear and Pepper Embossing Powder by WOW
Stazon ink Black
Momento in Black
Post it notes

Here is how I made it.


Step One.

Cover your chipboard Shape with patterned Paper, I used Prima paper, I adhered this using Glue and Seal in Matt by Ranger.

Step 2.

Using my Distress Paints I daubed around the edges and then used my fingers to blend the paint onto the surface. If you find you have got patches of really strong colour, you can tone it down by adding Antique linen.


Once that had dried I took my Damask stencil by Prima and Antique Linen Distress ink, I applied this in patches over the surface. I sprinkled on my Embossing powder tapped off the excess and zapped it with my Heat Gun.


I carried on using my other stencils with lighter shades of distress ink until I was happy with my background.


Brushes are available from Ali Craft


Step Three.

I stamped my Doll onto card that is suitable for promarkers and coloured her in, I then proceeded to cut her out using fine tipped scissors and a craft knife ( for the gaps between her feet and legs).


Stamp another Doll onto some patterned paper and cut out her dress.

Step Four.

I applied a piece of Frosted film to some Paper from the Prima Pad Devine and stamped directly on top with the Wings stamp. I used Stazon for this step. 

I then used the tutorial by Tammy Tutterow to transfer the pattern to the frosted film, once I had finished this step I used an sizzix embossing folder to add some dimension to her wings.


Wing Detail

Step Five.

Cut out your Spiral Flowers in Felt and assemble. Then punch some Branches from some scraps of paper. 

Step Six.

Cut out your Letters and cover with Versamark and heat emboss using Wow embossing powder in Pepper, add a touch of Treasure gold if you'd like a mottled effect.


Step Seven.

Using the Treasure Gold accent the edges, leave this for about half an hour and then buff it up to give it a real sheen.


Now we can start to put all the elements together.

Adhere your Post it notes to the bottom of your panel, making sure you have room for your doll. Add some foam pads to the back of your doll and add her wings, adhere this to the panel.

Add your letters where you'd like them to be and glue down, I just used an PVA glue in a fine tipped bottle. Next add your flowers and you are finished.


If you own one of these dolls, you could always enter our current monthly blog challenge via HERE.  Do pop on over here to get inspired by the Design Team's creations and for the challenges details and rules.  You could win a £15 voucher to spend on the website.
Please do stop by for another blog project next Monday.


I do hope you liked my project and go on to create your own, These stamps are so much fun to work with!


Barbara

13 Aug 2013

Crawley workshop 31st August


Ali-Craft Crawley Workshop on Saturday 31st August 2013 in Crawley, West Sussex.

Come join Ali, Heidi & Jane for a day of workshops and fun!
Further details are available on our website
www.ali-craft.co.uk


Tag made by Jane using Doo Lally Pip stamps